RichFaces Heading to JBoss AS7 Era
July 19, 2011
I’m very excited to show RichFaces users how easy (and productive) life can be when running on JBoss Application Server 7!
It’s not necessary to enumerate all the features of JBoss AS7 (there are others that have already done so), but it’s at least worth mentioning that AS7 is extremely light-weight – and that’s the UI that developers are interested in!
Light-weight containers – Java EE features ready web developers?
The AS7 core itself starts in no more than 3 seconds. Such a fast start is achieved by an extremely modular architecture where modules are started in parallel. I invite you to see Lincoln’s video showing AS7 fighting in the wild.
What’s so great about AS7 and why should you use it? Let’s start with some benchmarks of real deployment:
- AS7 – 10.907s – 11s
- AS6 – 31.248s – 31s
- Tomcat 7 – 17.313s – 17s
- Tomcat 6 – 7.065s – 7s
This certainly looks promising.
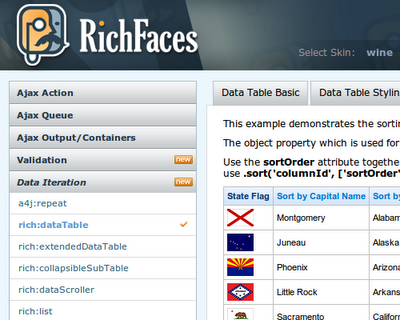
Just note that these results are measured from the startup of the RichFaces Showcase application, which currently employs several hot features of the Java EE stack: CDI, JPA, JMS and JSF.
You can imagine the difference in web development experience on AS7 and other application servers.
Still don’t believe me? Just check out the guide below on how to deploy RichFaces Showcase yourself.
RichFaces 4 running on AS7 here and now
We have prepared two demonstration applications targeting AS7 to show how easy it is to get RichFaces running.
We’ll first touch the Showcase application (since you can deploy it as it is: just clone, build and run) and then go discover Tweetstream application, which is really nice sample of tweet tracking for both mobile and desktop browsers.
Showcase on AS7
Clone the project from the Git repository
You need to clone the project from RichFaces Showcase repository, move into that directory, and then reset to a specific reference point (i.e. a specific commit) like so:
$ git clone git://github.com/richfaces/showcase.git
$ cd showcase
$ git checkout -b blog-demo 54b8211b9bfc065dda32c8809cd9a4e2b7c90b71
Build the project
At first, make sure you have properly setup Maven for development with JBoss repositories (check out Maven Getting Started, paragraph “Configuring Maven to use the JBoss Repository”).
$ mvn clean package -Pjbas7 --update-snapshotsThe Maven build will take some time, but once complete, you will have a WAR file deployable on AS7.
Download and unpack AS7 distribution
Now you need the actual server, so go to the JBoss AS download page and obtain the latest AS7 distribution archive (be sure to grab a distribution which contains everything, not only the Web Profile). Then unpack it and enter the newly-created directory. You may also find useful documentation in Getting started with AS7.
Deploy Showcase to AS7
Take the WAR file from the Maven build (which is located at showcase/target/richfaces-showcase-jbas7.war), copy it to the deployments directory, and finally rename it to showcase.war (jboss-7.0.0/standalone/deployments/showcase.war).
Start AS7
Enter the jboss-7.0.0/bin directory and run
$ ./standalone.sh --server-config standalone-preview.xmlIf deployment is successful, you should see
registering web context: /showcase
Deployed "showcase.war
on last few lines of the server console.
Enter the Showcase application
Start your browser and point it at: http://localhost:8080/showcase/.
Et voilà! You have successfully deployed the RichFaces Showcase application!
Diving Deep into Showcase and AS7 Specific Requirements
Showcase deployment was easy enough; now we’ll go through the behind the scenes configuration of both Showcase and AS7.
First, we needed to deploy in Preview configuration (which was denoted by using --server-config standalone-preview.xml switch). That was necessary because AS 7.0.0 is certified to JavaEE 6 Web Profile only. The Preview configuration then contains the sample of what’s going to be in Full Profile and what is baking in 7.1.0, but still needs further work.
For both JSF and CDI, it is enough to create two configuration files, faces-config.xml and beans.xml, to load the appropriate modules. For JPA, it is necessary to create persistence.xml with a proper configuration. Showcase uses ExampleDS as the data source, which is deployed out-of-the-box on AS7 for sample applications.
In the case of JMS, the situation is a bit different, since it is not possible to initialize it by configuring WAR deployment: RichFaces Push needs to have JMS topics initialized just before the application starts. The Java API for DMR creates topics on the JMS server bundled with AS7 (HornetQ) when an application is being deployed. Using this API, you can manage the server in an elegant way, as the following snippet from the JMS provider management script shows:
public void createTopic(String topicName, String jndiName) throws Exception {
    ...
    operation = new ModelNode();
    operation.get("operation").set("add");
    operation.get("address").add("subsystem", "messaging");
    operation.get("address").add("jms-topic", topicName);
    operation.get("entries").add(jndiName);
    client.executeAsync(operation, null);
    ...
}
RichFaces Push needs to be configured for using of blocking I/O approach of managing requests on AS7. You need to configure org.atmosphere.useBlocking=true in web.xml.
These tweaks are necessary to get Showcase working on AS7 without having to perform any custom server management operations before the application is deployed.
Now we’re ready to get looking at a higher level and inspect the Tweetstream application and other options of deployment control and server management.
Tweetstream on AS7
Tweetstream is a RichFaces/JSF2 app that was optimized for mobile device browsers. It was writen by Jay Balunas and Wesley Hales for the JBoss World 2011 Keynote. You may find more information on blogs RichFaces And The Mobile Web… and Runtime Type Detection and Usage with Weld.
Connection to twitter is driven through OAuth credentials and associated security tokens. These credentials are pre-filled in properties file using fake twitter account created for demonstration purpose, but I encourage you to change them – Twitter won’t allow two consumers (like the Tweetstream application) to connect using the same application account.<
To run Tweetstream, you should follow the same steps you used in the Showcase example above, but additionally you need to setup Twitter OAuth credentials and also setup JMS. We will also inspect another way to deploy WAR files.
The following section assumes that you have already downloaded and unpacked AS7 (using the Showcase instructions above).
Clone the Project from the Git Repository
You need to clone project from RichFaces Tweetstream repository, move into that directory, and then reset to a specific reference point (i.e. a specific commit) like so:
$ git clone git://github.com/richfaces/tweetstream.git
$ cd tweetstream
$ git checkout -b blog-demo ccae090ef0c59c9275fb011aa426a88f53544fe1
Change the Twitter4j Credentials (optional)
This is really not that hard, but it does require some effort. Because these steps change from time to time you should refer to http://twitter4j.org/en/configuration.html and https://dev.twitter.com/pages/auth for up-to-date details.
Once you have access to the values in tweetstream/src/main/resources/twitter4j.properties:
oauth.consumerKey=**************************
oauth.consumerSecret=**************************
oauth.accessToken=**************************
oauth.accessTokenSecret=**************************
Update with these your own values.
Change Keywords that Tweetstream Tracks (optional)
By default, Tweetstream tracks various JBoss related keywords with twitter4j. If you want to change the tracking list, just enter another keyword (each on its own line) in this file:
tweetstream/src/main/resources/twittertracks.propertiesBuild the Project
Before starting a build, make sure you have properly setup Maven for development with JBoss repositories (check out Maven Getting Started, paragraph “Configuring Maven to use the JBoss Repository”).
$ mvn clean package --update-snapshotsStart AS7
Without deploying the application, start the server by entering the jboss-7.0.0/bin directory and running:
$ ./standalone.sh --server-config standalone-preview.xmlCreate the JMS Topic on AS7
To do this, you have two choices: use AS7’s command line admin interface, or use the web console. Both are bundled with AS7 distribution:
Command-line interface
To start the command line interface, ensure AS7 is running and enter the jboss-7.0.0 directory. From this directory, follow these steps:
$ ./jboss-admin.sh
[disconnected /] connect
[standalone@localhost:9999 /] add-jms-topic --name=twitter --entries=topic/twitter
Using the Web Console
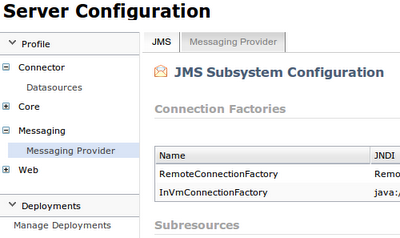
Navigate to http://localhost:9990/console/ in your browser. In the management console, select Messaging > Messaging Provider, look for Subresources, and switch to the Topics tab. Hit the Add button (on the right) and in the popup titled Create JMS Topic, enter twitter as the name and topic/twitter as the JNDI.
Deploy Tweetstream to AS7
You can certainly use the deployment way mentioned in the Showcase guide above, but I will show here two different ways to deploy: by using the web console, or using the command line interface.
Using the Web Console
Enter the console again (http://localhost:9990/console/) and select Deployments > Manage Deployments and hit the Add Content button (on the right). In the popup, Choose a WAR file to deploy and hit Next button. Leave the default values in the next popup screen and hit the Finish button. The popup will disappear and you will see your WAR in the list of deployed resources. Hit the Enable button for tweetstream.war. You should see a green ball indicating successful deployment.
Using the Command Line Interface
Start the command line interface again and follow these steps:
$ **./jboss-admin.sh** [disconnected /] connect[standalone@localhost:9999 /] deploy /path_to_tweetstream/target/tweetstream.war tweetstream.war' deployed successfully.<a href="/images/blog/2011-07-19-richfaces-heading-to-jboss-as7-era/Screenshot-19.png"><img style="cursor:pointer; cursor:hand;width: 400px; height: 224px;" src="/images/blog/2011-07-19-richfaces-heading-to-jboss-as7-era/Screenshot-19.png" alt="" id="BLOGGER_PHOTO_ID_5631116023812325106" border="0" /></a>
Enjoy the Tweetstream application!
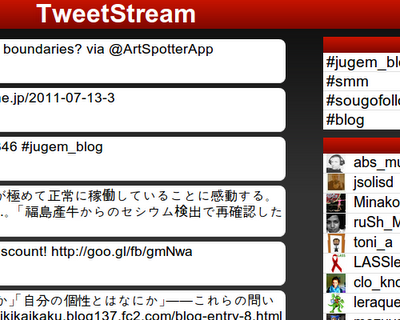
Enter http://localhost:8080/tweetstream/ in your browser. From now on, new tweets are displayed on the left side of the page and the top hashes and tweeters counts are displayed on the right side.
As you can see, AS7 deployment is simple, and multiple means of deployment are provided. Nevertheless, application startup time has been reduced dramatically, finally giving web developers the speed they need!


